Brackets Accepting Teams
When a team registers for your event, the Tournament Director must choose to either accept or decline the registration. Accepting a team enables the Team Admin to submit payment for the tournament fee. Brackets provides two methods for accepting teams.
-
Auto-Acceptance. With Auto-Acceptance enabled, any team to register will be automatically accepted in your tournament and will be able to immediately make a credit card payment or create a cheque/e-transfer submission. To enable Auto-Accept, in Brackets navigate to Initial Configuration —> Limits & Workflows.
- Manual Acceptance (used by most tournaments). When a team completes their registration, Brackets will place this submission in the "Pending" queue and requires the Tournament Director to manually change the teams registration status from "Pending" to "Accepted" or to "Declined" if you do not want the team in your tournament.
Manually accepting a team is simple. In Brackets, navigate to Manage Teams —> Registered Teams. With the list of teams, double click on the specific Team Name (grey line = Pending).
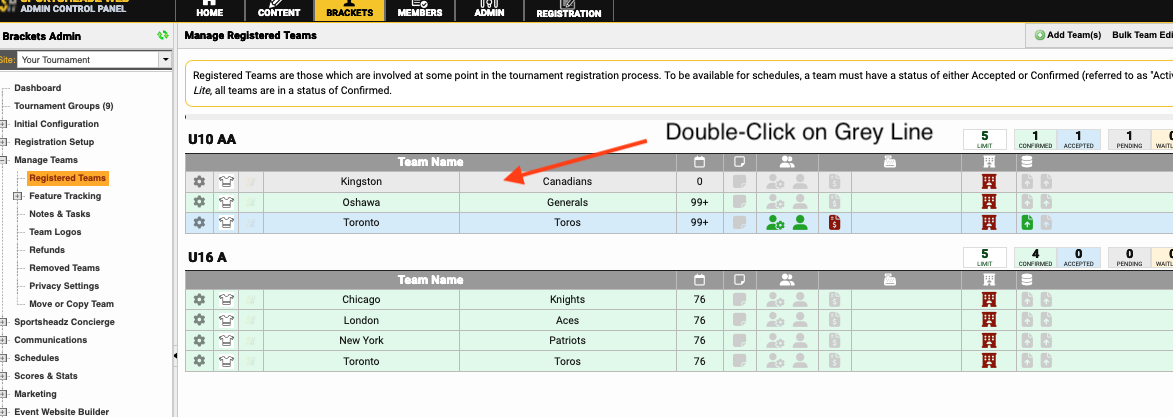
A window will open;
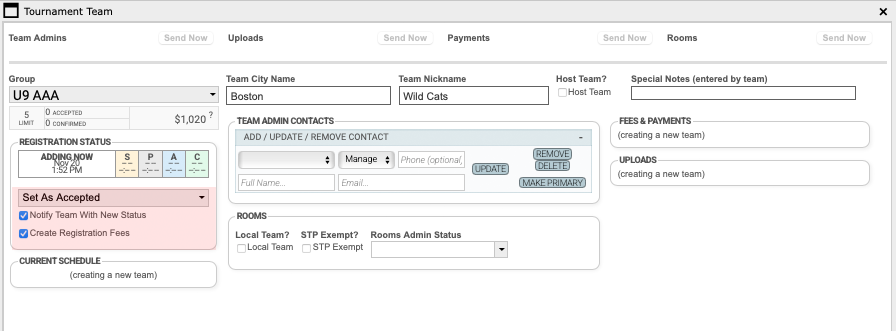
Change the registration status to "Set as Accepted" or "Set as Declined". If you are declining the team, add a reason in the window. Click Update to change the team's status.
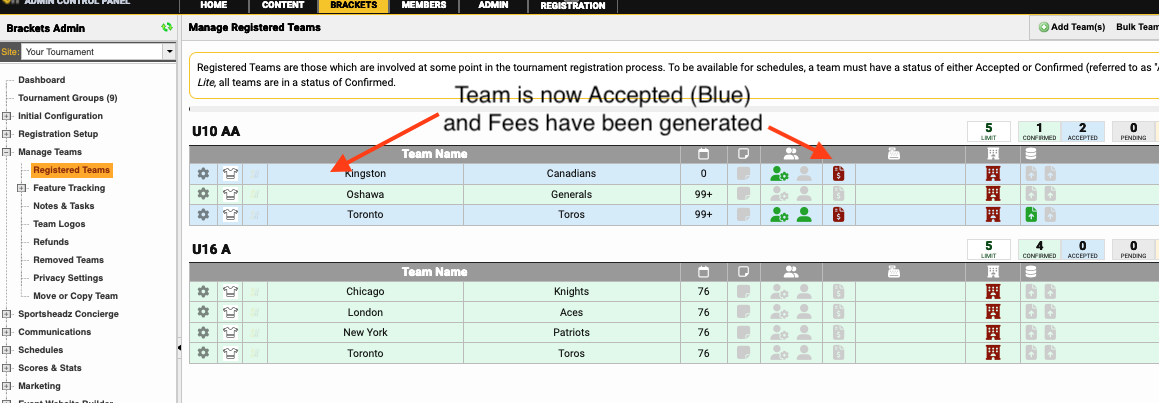
The team is now accepted (in Blue) and fees have been generated for this team. The team's Admin(s) will receive an Acceptance email from Brackets.
Special Notes:
- If you are manually adding your home teams and they will not be paying through Brackets, do not mark them as “Accepted.” Instead, add them as “Confirmed” teams. This will prevent tournament fees from being generated.
- Only teams that have paid in full should appear in green (Confirmed) status. This also includes your home teams that are not required to pay. Please note that submitting a deposit alone does not make a team “Confirmed.”
- Make sure you add the name and email address for your home team's primary contact.